A provisioning profile is a binary file that you can use to run an app on a device and use its services while it is being developed.
To distribute your app to the App Store, you need to create a Distribution Provisioning Profile in order to get it approved by Apple. In this case, your build will be signed with the Production gateway.
To learn how to create a provisioning profile, follow the instructions on the Apple help page.
In order to create a Provisioning Profile, you should log in to https://developer.apple.com and go to the Certificates, Identifiers & Profiles section.
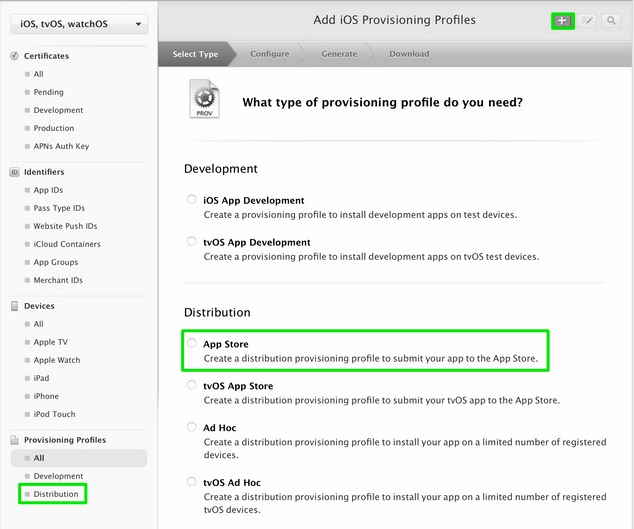
1. On the left tab under Provisioning Profiles, select Distribution
Select add button “+” at the top right to create a new profile
Select “App Store” and press Continue

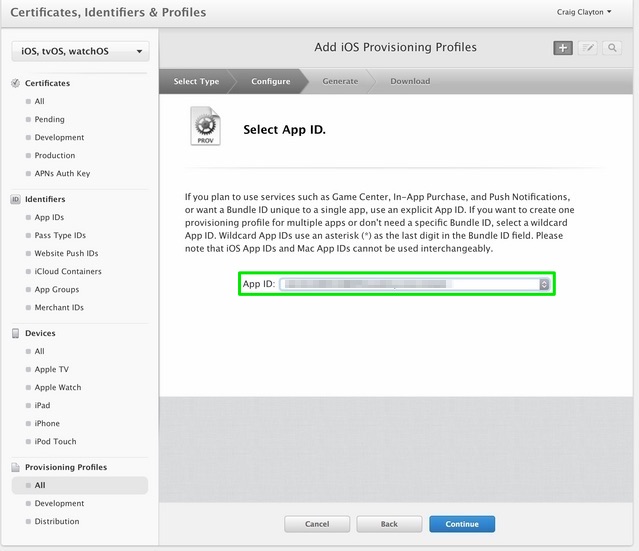
2. Select App ID and press Continue

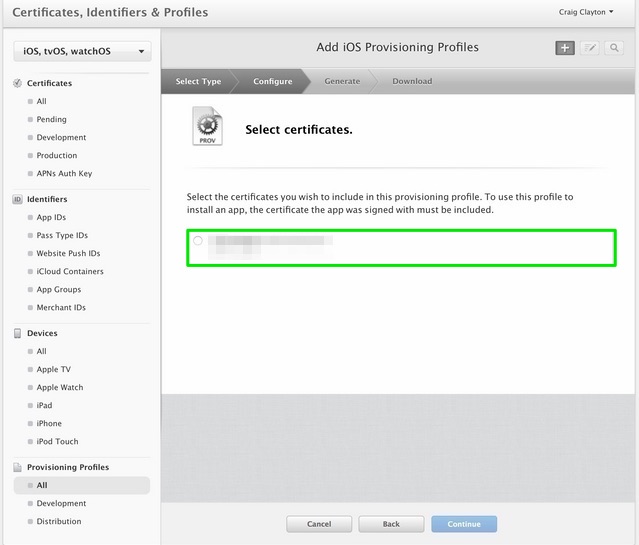
3. Select the Certificate you wish to include in this provisioning profile (the certificate the app was signed with) and click Continue.

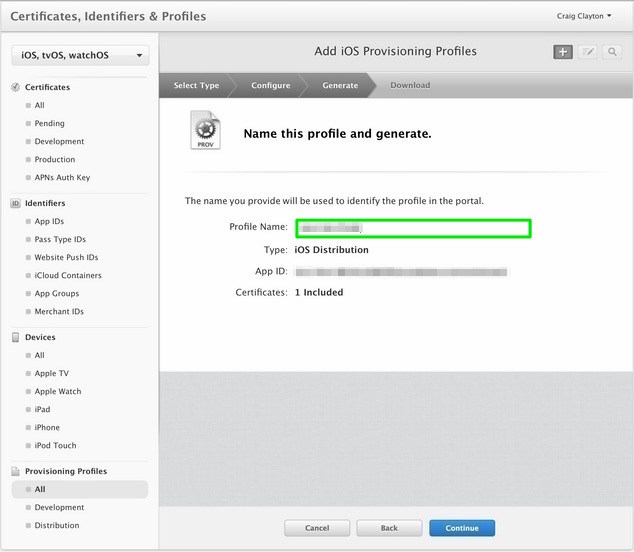
4. Create a name for your profile and click Continue.

For correct push notifications behavior, your Pushwoosh application should be configured with a Production certificate and gateway as well. You will find more detailed information on platform configuration in our iOS Guide: https://docs.pushwoosh.com/platform-docs/v/master/pushwoosh-sdk/ios-push-notifications/ios-platform-configuration
Comments
0 comments
Please sign in to leave a comment.